
Build Your Grip
The grip is your only connection to the club. Get it right and everything downstream gets easier. Start here before anything else.
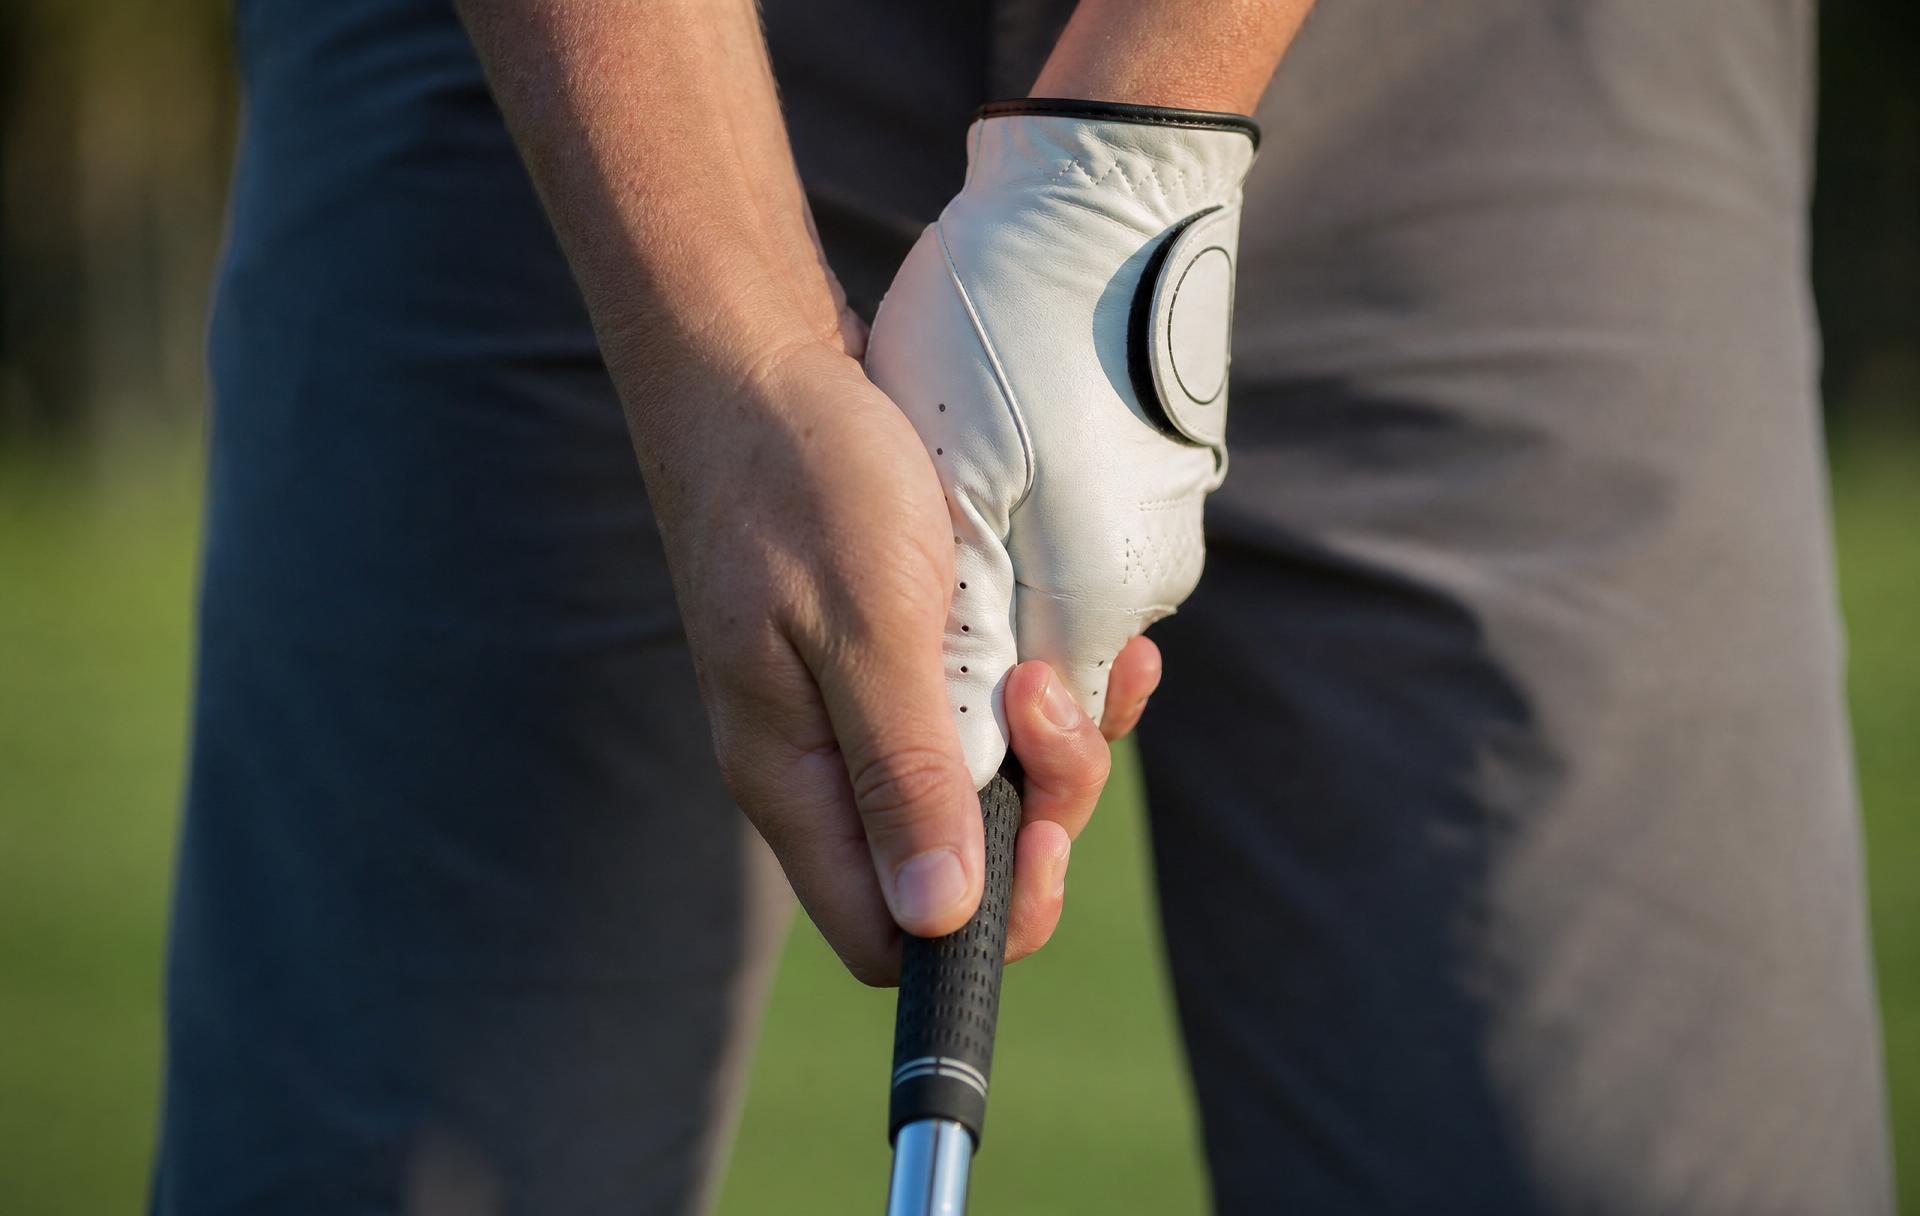
Step by step
- Let the club hang down in front of you. Place your lead hand (left hand for right-handed golfers) on top of the grip first.
- The handle should run diagonally across the base of your fingers, not deep in your palm. Close your hand so your thumb rests just right of center on top of the grip.
- Add your trail hand (right hand) below it so the lifeline of your palm covers your lead thumb. Your trail thumb sits just left of center.
- Connect the hands: either overlap your trail pinky over the gap between your lead index and middle fingers, or interlock them. Pick whichever feels natural.
- Check grip pressure — hold it like a tube of toothpaste you don't want to squeeze out. About 4 out of 10.
Check yourself
- Looking down, you should see roughly 2–3 knuckles on your lead hand.
- The 'V' formed by each thumb and forefinger should point toward your trail shoulder.
- Your hands should feel like one unit, not two separate hands fighting each other.
Common mistakes
- Gripping in the palm instead of the fingers — this kills wrist hinge and clubhead speed.
- Squeezing too tightly. Tension travels up the arms into the shoulders and ruins the swing.
- Re-gripping or adjusting your hands during the swing.
Gear tip
Wear a glove on your lead hand. It improves grip security in heat and rain and helps prevent blisters while you build up calluses.
A beginner refresher only — not professional instruction. See a PGA pro for a personalized grip check.